Version Control Lab
Purpose
A getting-started tutorial for those new to Git version control with Ignition 8.3. By the end, you'll have a working Docker-based Ignition project tracked in Git, with a full commit-and-PR workflow under your belt.
This lab follows the Additive Approach described in the Ignition 8.3 Version Control Guide. The key idea: instead of tracking the entire Ignition data directory and ignoring what you don't want, you selectively mount only the directories you care about into the container. Git only sees those directories.
Before Getting Started
Ensure the following are set up:
- Workstation Setup complete (Git, GitHub CLI, VS Code, Docker Desktop)
- GitHub account with SSH or HTTPS access configured
Step 1: Create Your Repository from the Template
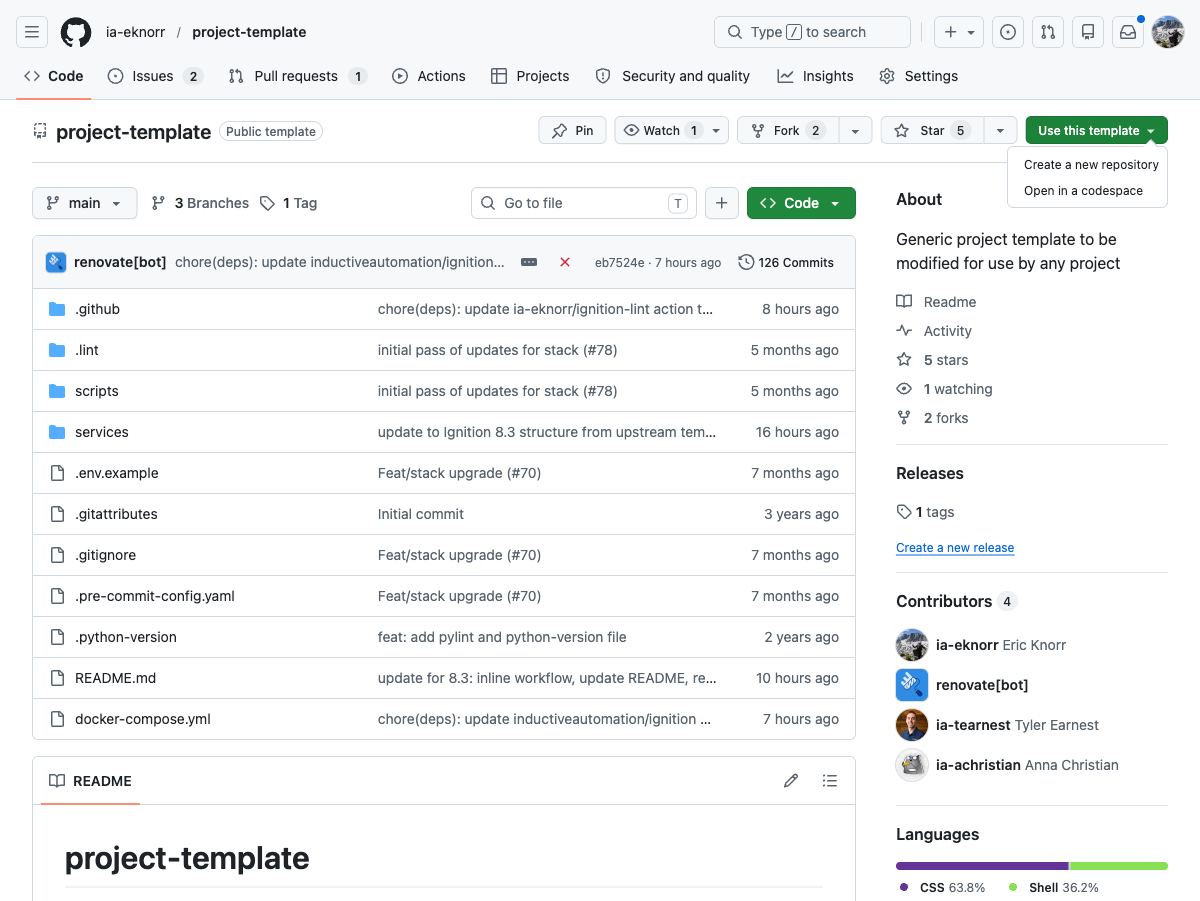
The ia-eknorr/project-template gives you a pre-configured Ignition 8.3 Docker project
with the right bind mounts already in place.
Create the repository on GitHub
-
Click the green Use this template button, then select Create a new repository:
-
Fill in the form:
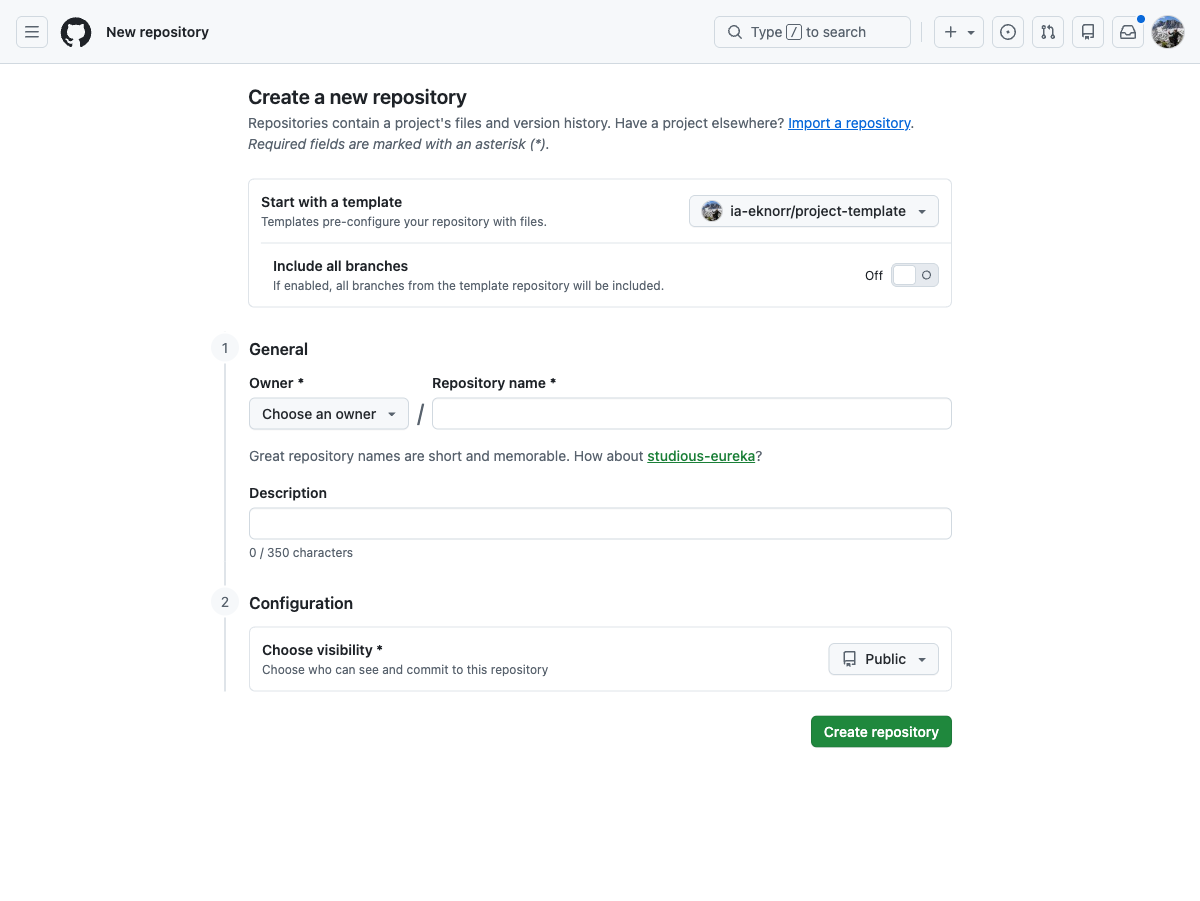
- Owner: select your personal GitHub account
- Repository name: use your project name, e.g.
my-ignition-project(lowercase with dashes) - Description: optional, but recommended
- Visibility: Private is a good default for a learning repo; Public if you want to share it
- Leave Include all branches off
- Click Create repository
"Use this template" creates a fresh repository on your account with a clean commit history and no fork relationship to the original. If you cloned the template directly you would not be able to push to GitHub without changing the remote.
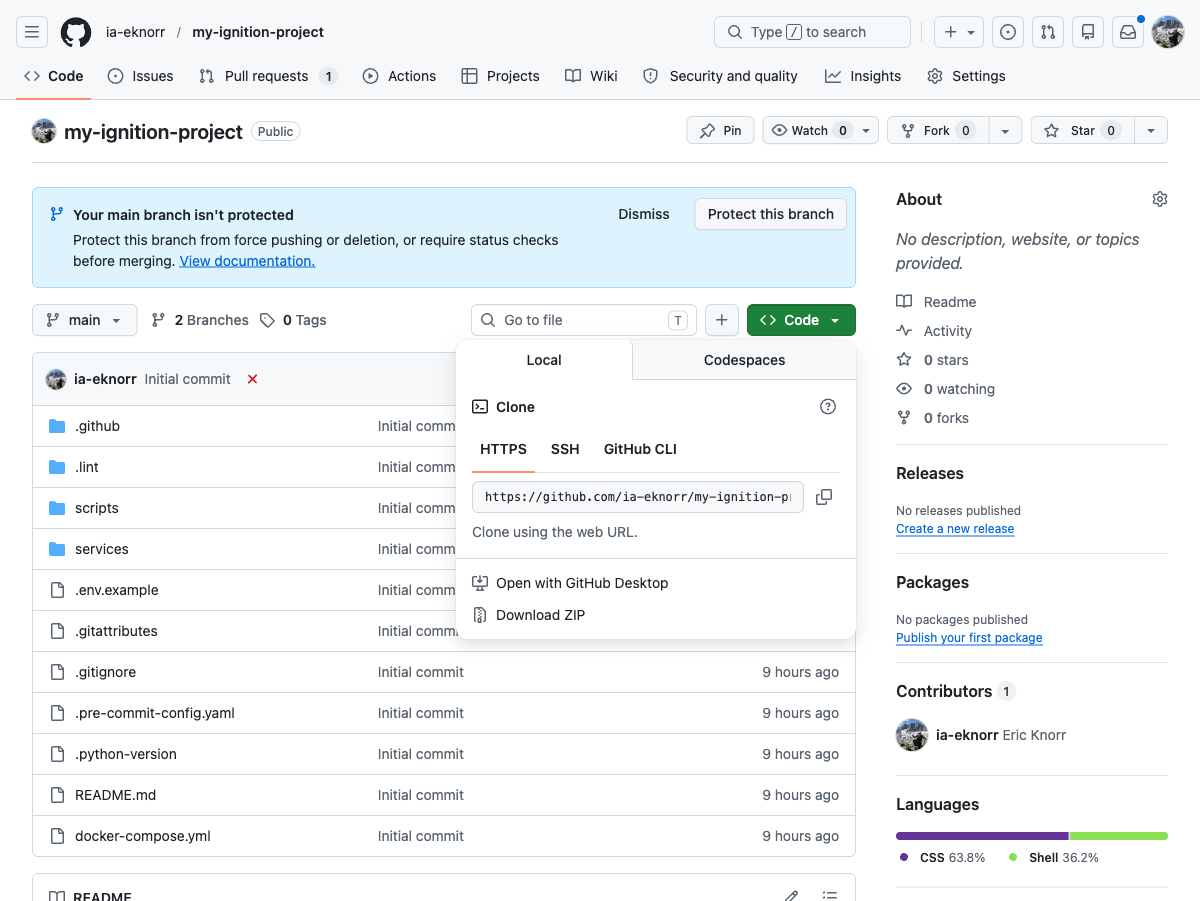
Clone the repository to your machine
-
On your new repository page, click the green Code button and copy the HTTPS URL:
-
Open a terminal:
- Mac: open Terminal (or any terminal app)
- Windows: open Git Bash or PowerShell
-
Navigate to where you keep projects, then clone:
cd ~/projectsgit clone https://github.com/<your-username>/my-ignition-project.gitThis creates a
my-ignition-projectfolder in~/projects/.
Open in VS Code
-
Open VS Code, then go to File → Open Folder and select the
my-ignition-projectfolder you just cloned. -
Open the integrated terminal: Terminal → New Terminal (or
Ctrl+`). All commands from this point forward are run here.
Step 2: Configure the Environment
The template uses a .env file for per-machine settings that should not be committed.
-
In the VS Code integrated terminal, copy the example file:
# Mac / Linuxcp .env.example .env# Windows (PowerShell)copy .env.example .env -
In the VS Code file tree on the left, click
.envto open it. SetGATEWAY_NAMEto match your repository name (e.g.,my-ignition-project). This becomes the Traefik hostname — your gateway will be available athttp://my-ignition-project.localtest.me. -
Review
docker-compose.yml. The two key volume mounts are:volumes:- ./services/ignition/projects:/usr/local/bin/ignition/data/projects- ./services/ignition/config:/usr/local/bin/ignition/data/configThese directories in your repo are bind-mounted directly into the container. Changes you make in the Designer appear instantly in
services/ignition/projects/- no export step needed. This is the additive approach in action.
The .env file is listed in .gitignore by default. Environment-specific values (gateway
name, credentials) should never be committed. Share configuration through .env.example
instead.
The template starts the gateway in dev deployment mode. Deployment modes allow a single
config repository to serve multiple environments (dev, QA, prod) by layering
environment-specific overrides at runtime - but this only applies to gateway configuration,
not Perspective projects. For this lab the dev mode is pre-set and requires no changes.
See Gateway Resource Collections for a full
explanation of the collection hierarchy and when to use deployment modes.
Step 3: Start the Gateway
docker compose up -d
Watch the logs until the gateway is healthy:
docker compose logs -f gateway
You'll see Gateway started successfully when it's ready. Then open
http://<GATEWAY_NAME>.localtest.me in your browser (requires Traefik - see
Traefik Reverse Proxy).
If this is the first startup, complete the commissioning wizard:
- Accept the license agreement
- Set an admin username and password
- Select Standard Edition (or your licensed edition)
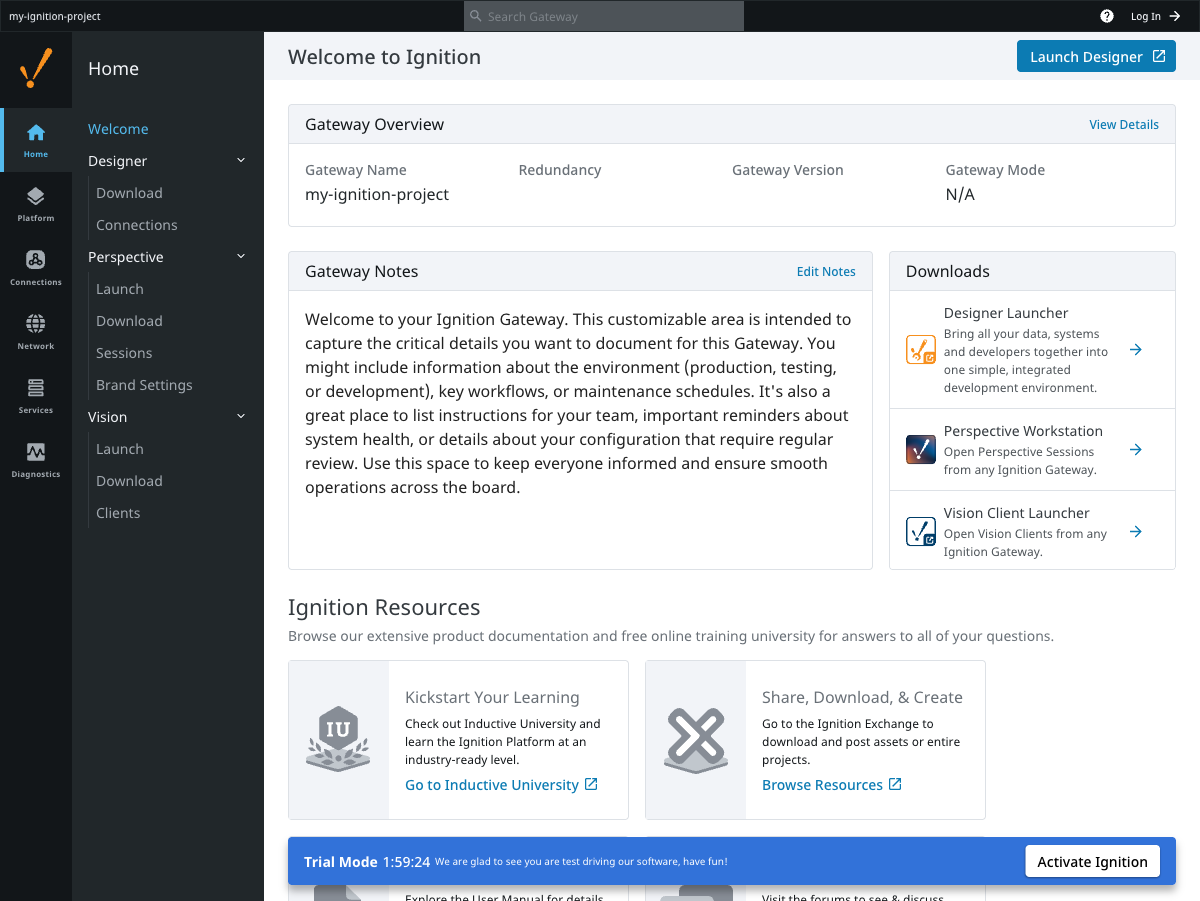
After commissioning you'll land on the gateway home page:
- Port 80 in use: make sure Traefik is running (
docker compose up -din your Traefik directory) - Gateway not healthy after 2-3 minutes: run
docker compose logs gatewayto see what's wrong - On Windows: make sure Docker Desktop is running before running
docker compose up - On Linux with native Docker (not Docker Desktop): if the gateway can't write to mounted volumes, run
sudo chown -R 2003:2003 services/ignition/to match the container'signitionuser
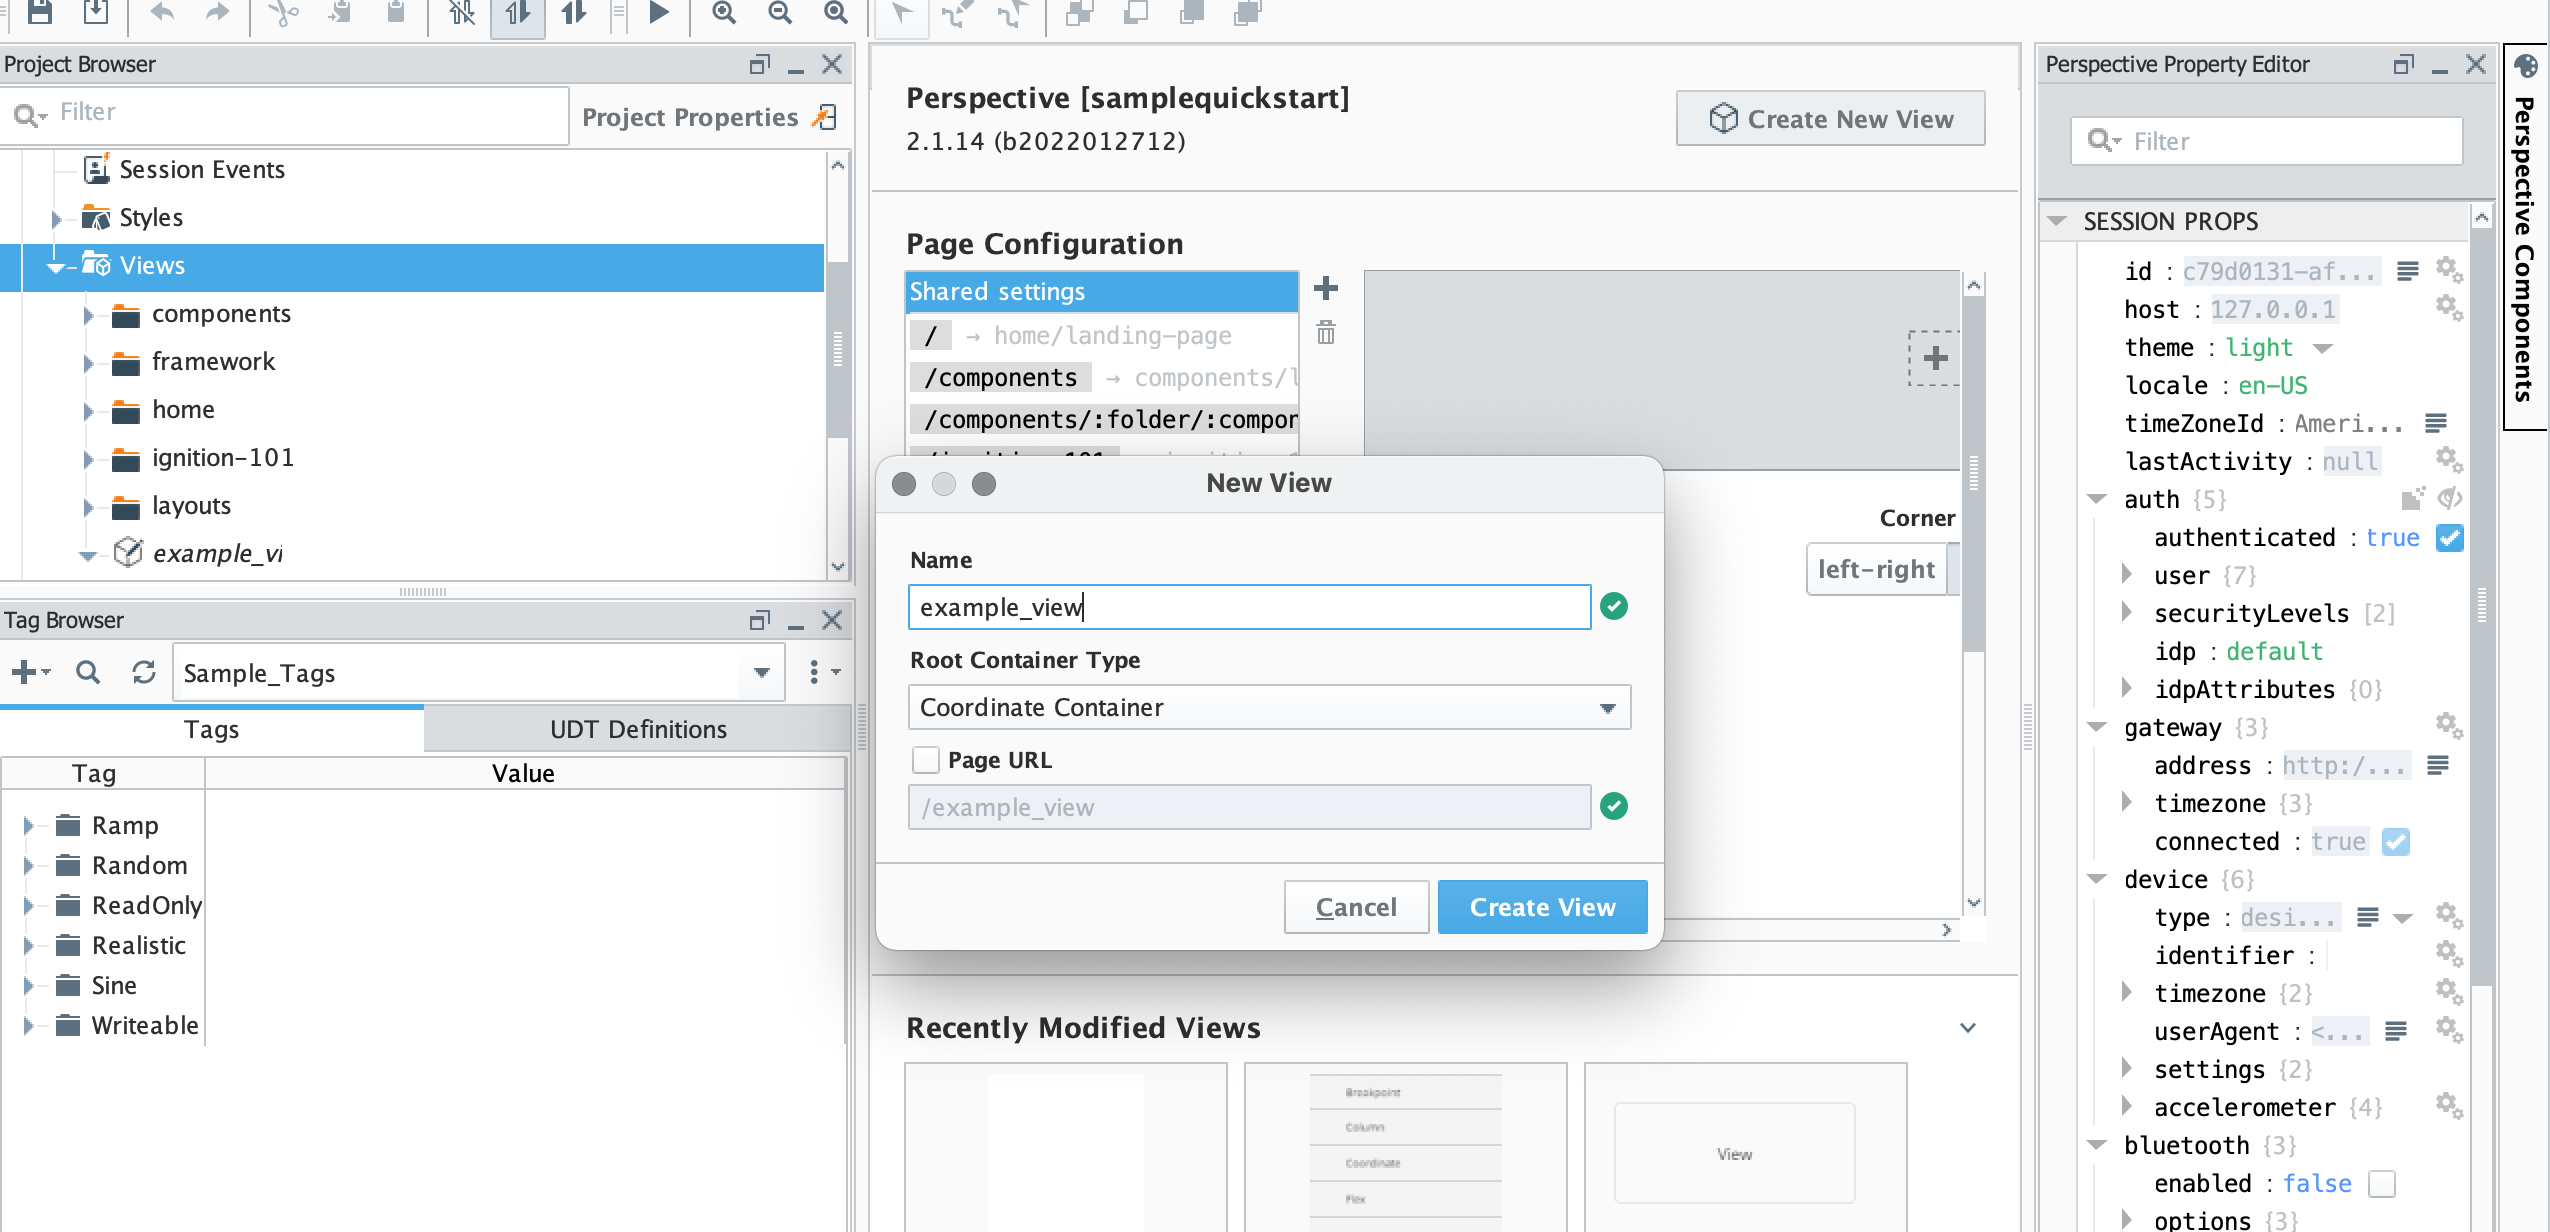
Step 4: Create a Project in the Designer
- On the gateway homepage, click Launch Designer
- Log in with the admin credentials you set during commissioning
- Click New Project, give it a name (e.g.,
my_project), and open it - In the Project Browser, right-click Views and add a new view
- Drag a Label component onto the view and change its text to something recognizable
- Save: File → Save and Publish (or
Ctrl+S)
Step 5: See the Changes in Git
Back in VS Code, open the integrated terminal and run:
$ git status
On branch main
Changes not staged for commit:
(use "git add [file]..." to update what will be committed)
(use "git restore [file]..." to discard changes in working directory)
      modified:   services/ignition/projects/my_project/com.inductiveautomation.perspective/views/example_view/resource.json
      modified:   services/ignition/projects/my_project/com.inductiveautomation.perspective/views/example_view/view.json

no changes added to commit (use "git add" and/or "git commit -a")
The new project files appear under services/ignition/projects/my_project/. This is the
bind mount at work - no export or copy was needed.
Run git diff on one of the files to see what changed:
git diff HEAD services/ignition/projects/my_project/
Ignition stores each resource as a pair of files:
resource.json- metadata (resource type, scope, documentation)- A content file -
view.jsonfor Perspective views,.pyfor scripts, etc.
These are human-readable JSON/text files, which is what makes them useful to track in Git. You can diff them, review them in a PR, and see exactly what changed and why.
resource.json and its content file (view.json, .py, etc.) are a pair - always stage
and commit them together. Committing one without the other leaves the resource in an
inconsistent state that can break the Designer or prevent the project from loading.
Also avoid committing session-props/props.json - it stores per-session UI state and
changes constantly without representing real work.
Step 6: Review the .gitignore
Open .gitignore in VS Code. The template pre-configures these exclusions:
# Local config - environment-specific, do not share
**/config/local
**/config/resources/local

# Conversion artifacts
**/conversion-report.txt
**/.resources/
Because the additive approach only mounts specific directories into the container, Git never
sees runtime artifacts, database files, logs, or certificates - they live inside the Docker
volume, completely outside the repo. This keeps the .gitignore short.
See the Git Style Guide for the full pattern reference including host install patterns.
Step 7: Stage, Commit, and Push
Create a feature branch for your changes (do not commit directly to main):
$ git checkout -b feature/add-initial-view
Switched to a new branch 'feature/add-initial-view'
Stage the project directory and commit:
git add services/ignition/projects/
git commit -m "feat: add initial perspective view"
Push to GitHub:
$ git push -u origin HEAD
Enumerating objects: 8, done.
Counting objects: 100% (8/8), done.
Delta compression using up to 10 threads
Compressing objects: 100% (5/5), done.
Writing objects: 100% (6/6), 1.24 KiB | 1.24 MiB/s, done.
Total 6 (delta 2), reused 0 (delta 0), pack-reused 0
remote: Resolving deltas: 100% (2/2), completed with 2 local objects.
remote:
remote: Create a pull request for 'feature/add-initial-view' on GitHub by visiting:
remote:     https://github.com/your-org/your-repo/pull/new/feature/add-initial-view
remote:
To https://github.com/your-org/your-repo.git
* [new branch]      HEAD -> feature/add-initial-view
Branch 'feature/add-initial-view' set up to track remote branch 'feature/add-initial-view' from 'origin'.
Using prefixes like feat:, fix:, and chore: (Conventional Commits) makes it easy to
scan history at a glance. See the Style Guide for conventions.
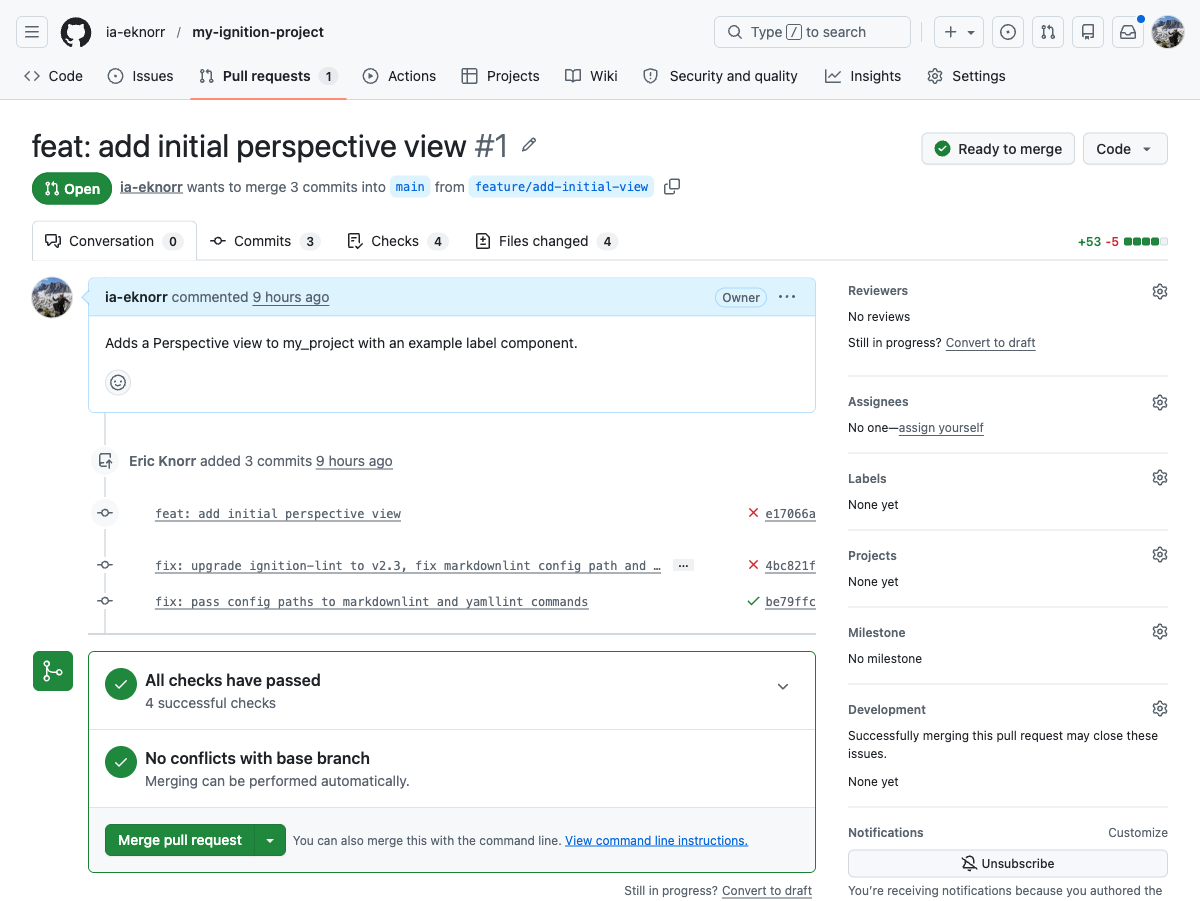
Step 8: Create a Pull Request
After pushing, Git prints a URL to create a pull request. Open it, or navigate to the Pull Requests tab on GitHub.
![]()
-
Review the file diff - you should see the view JSON you just created
-
Add a title and a short description
-
Select Create Pull Request
On a solo project, you can review and merge it yourself. Building this habit now makes collaboration on a team seamless.
-
Select Squash and merge to keep a clean commit history on
main- see Merge a Pull Request for a comparison of all three merge strategies
Step 9: Pull Changes Locally
After merging, bring main up to date:
$ git checkout main
Switched to branch 'main'
Your branch is up to date with 'origin/main'.
$ git pull origin main
remote: Enumerating objects: 1, done.
remote: Counting objects: 100% (1/1), done.
remote: Total 1 (delta 0), reused 0 (delta 0), pack-reused 0
Unpacking objects: 100% (1/1), 276 bytes | 276.00 KiB/s, done.
From https://github.com/your-org/your-repo
* branch            main       -> FETCH_HEAD
 9f805c2..31f1139  main       -> origin/main
Updating 9f805c2..31f1139
Fast-forward
services/ignition/projects/my_project/.../view.json | 3 ++-
1 file changed, 2 insertions(+), 1 deletion(-)
Your local main now matches the remote. Start the next feature with a new branch off main.
Common Docker Operations
| Command | What It Does |
|---|---|
docker compose up -d | Start the stack (background) |
docker compose down | Stop the stack |
docker compose down -v | Stop and remove volumes (full reset) |
docker compose ps | View running services and health |
docker compose logs -f gateway | Stream gateway logs |
docker compose exec gateway bash | Open a shell inside the gateway container |
docker compose restart gateway | Restart the gateway |
Common Git Errors
- Untracked file you don't want to commit:
git rm --cached path/to/fileremoves it from staging without deleting the file, then add it to.gitignore - Merge conflict: Pull the destination branch into your branch
(
git pull origin main), resolve>>>markers in VS Code, commit, and push - Accidentally committed to
main: Create a branch frommainwith your changes (git checkout -b my-branch), then resetmainto the previous commit (git reset --hard HEAD~1) - Need to find a lost commit:
git reflogshows the full history of where HEAD has been
Additional Resources
- Ignition 8.3 Version Control Guide - Official IA reference
- Additive Approach - The bind-mount strategy used in this lab
- Version Control Guide - Git basics and branching strategies
- Git Style Guide - Naming conventions and commit standards
- Gateway Resource Collections - Deep dive on core, deployment modes, and what to put where
- Traefik Reverse Proxy - Named local URLs when running multiple gateways